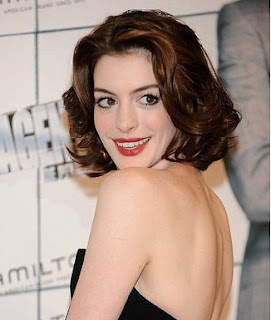
 Anne Hathaway has been looking just gorgeous recently – and I mean, she deserves to! She dumped the no-good boyfriend, cropped the hair… seriously, people, this girl is glowing!
If you haven’t heard yet, this smart little moment happened on the red carpet the other day:
“Personal questions were strictly forbidden at the Italian premiere of Get Smart on Monday – but that didn’t stop one reporter from asking the movie’s star, Anne Hathaway, ‘Was the separation from your ex-boyfriend painful?’
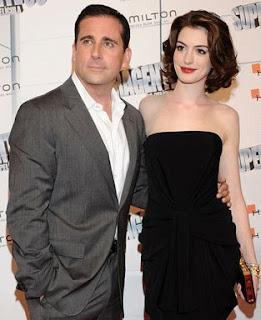
…After the reporter lobbed the question, Hathaway remained silent and attempted a faint smile. But, as if on cue, her costar Steve Carell valiantly stepped in to declare: ‘In my role of agent [for] Miss Hathaway, I would like to say that she does not answer questions relating to this subject.'”
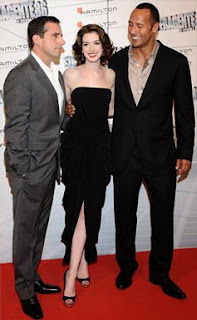 In other news, have you taken a good look at her dress?! The folding (more obvious in the first picture) is just perfect, and the slit (look left) is smoking!
I just love how she let her face and the dress take a simple centre stage, with a gorgeous clutch and gold bracelets as her only accessories (again, visible only in the first photo on the right). The black peep-toe shoes were just the perfect choice!
To get her make-up:
- Conceal well – undereye circles must not be seen!
- Apply a matte base. If you’re really oily, use these tricks to help!
- Sweep a light pink cream-to-powder or powder blush over the apples of your cheeks.
- Fill in (and/or clean up!) brows.
- Use a similar shade for your lids; keep your eyes basic and nude, hi-lighting the brow bone with a (matte!) almost-white shade and using pink and light beige colours in your crease.
- Line eyes heavily in black; stop lining right under the centre your iris on the bottom and above the inside edge of your iris on the top. Smudge inwards so you don’t end up with a harsh stop. (Winging optional; Anne doesn’t but a little wing would look great here!) Do not line waterline – if you really want to, though, I would go with a white-ish colour. Minimal shimmer, or it won’t blend with the rest of your face!
- Line inside corners in white to brighten up your face (Again, Anne stays matte, but a bit of shimmer wouldn’t hurt here)
- Mascara, mascara, mascara – natural-looking fake eyelashes too, if you really want to glam it up! In-your-face volume and length is essential.
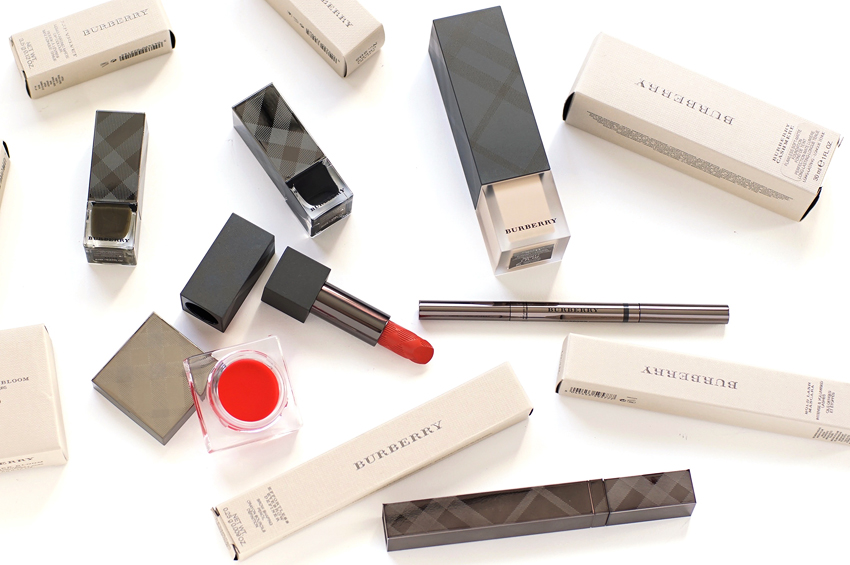
- Apply a fire-engine red lipstick, blot off – you want the look of a stain. Or, if you have it, use a lip pencil like Nars’ Velvet Matte Lip Pencil in Cruella. (note: because we’re not all beautiful and glowing like Anne, add a light gloss if you’re looking parched)
- Set everything with a light or translucent loose powder.
- Knock ’em dead!
- Part hair with a very tiny zigzag (helps with volume; comb hair back, use tail of a tail comb to “draw” a zigzag, pull right and left sides apart at the crown of your head and the zigzag should fall open), on either the right or left side of your head – whichever is more flattering. Add product: Spritz roots with a volumizing spray. Spray hair with a thickener, or work in a curl balm. A heat protecting product is optional.
- Using a round brush and blow-drier (or a curling iron blow-drier, which I have and definitely recommend purchasing), overdirect hair past the part and dry, pulling outwards. Slowly spin brush as you dry. This creates volume at the roots. (If this is too hard for you, flip your head over and blowdry it upside-down. This is easier but will not get you the same amount of volume.)
- Take front pieces of hair and blow dry diagonally – the front left piece should be dried while it is pulled back and to the right. Spin brush as you do this – we’re blowing in a curl that will lift your front pieces away from your face in swoops, like Anne’s hair!
- Make sure all your hair is bone-dry to prevent damage. Go over pieces that aren’t right now!
- Using a large barrel curling iron, curl! Keep the top voluminous but sleek, with most of the curls at ear level and below. TIP: clip up hair in layers, curling each layer a different direction to prevent hair from “clumping” and forming one big wave. Curl the top layer so that the curls curl away from your face so that they’re not tickling your nose all night long!
- Spray to set. Do not comb through!
- Optional, but I would do it: Spray with shine spray!

